How to Fix a Burst Pipe
Quick answer
To repair a burst pipe, first shut off the main water valve, then cut out the damaged section back to solid, round pipe. Join a new piece using a fitting matched to the pipe material: push-to-connect works on copper, PEX, and CPVC without tools. Call a licensed plumber for anything hidden inside a wall, under a slab, or underground.
Key takeaways
- A repair clamp or a rubber patch held with hose clamps is a stopgap, not a permanent fix; plumbing codes do not recognize it as a permanent repair, and it typically costs $10 to $25 at a hardware store.
- Push-to-connect fittings work on PEX, copper, CPVC, PE-RT, and HDPE pipe with no tools, solder, or glue, according to manufacturer SharkBite.
- About 80% of a professional burst-pipe repair bill is typically labor, and plumbers commonly charge $150 to $250 per linear foot, based on contractor cost estimates.
- A small CPVC joint (1/2 to 1-1/4 inch) needs about 1 hour to cure at 60 to 100 degrees Fahrenheit before pressure testing, per Oatey's manufacturer cure-time chart, and a repair cut-in needs more time than that new-installation figure.
- Call a licensed plumber instead of doing it yourself when the pipe is inside a wall, under a slab, underground, or made of old, corroded galvanized steel.
On this page
- Is It Safe to Fix a Burst Pipe Yourself, or Should You Call a Licensed Plumber?
- What Is the Difference Between a Temporary Patch and a Permanent Pipe Repair?
- How Do You Repair a Burst Pipe Depending on the Pipe Material?
- What Are the Step-by-Step Instructions for a Permanent Pipe Repair?
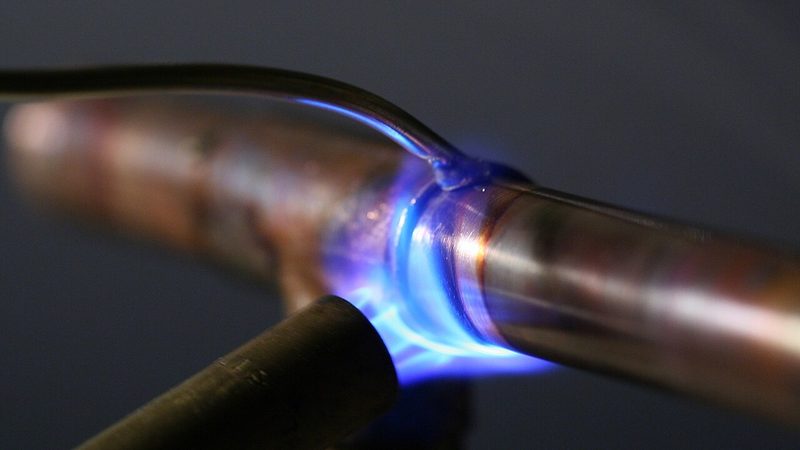
- Is It Safe to Solder or Use a Torch Indoors?
- Do You Need a Permit, and Can a Bad DIY Repair Affect Your Insurance Claim?
- How Much Does It Cost to Fix a Burst Pipe Yourself vs Hire a Plumber?
- What If the Burst Pipe Is Inside a Wall, Under a Slab, or Underground?
- When to call a professional
- Frequently asked questions
Is It Safe to Fix a Burst Pipe Yourself, or Should You Call a Licensed Plumber?
DIY repair is realistic only for a small, visible break in an easy-to-reach section of copper, PEX, or PVC pipe. Call a licensed plumber for anything hidden, large, on a main line, or on old, corroded pipe.
Before you repair anything, shut off the water the moment a pipe bursts and let the line drain. Cutting or fitting a pipe while it is still pressurized is unsafe and the joint will not seal.
| Situation | What to do |
|---|---|
| Small, visible split or pinhole in copper, PEX, or PVC, in an open area like a basement wall or under a sink | A DIY repair with a push-to-connect fitting is realistic |
| Pipe is inside a wall, under a slab, or underground | Call a licensed plumber; do not cut into the structure yourself |
| Pipe is galvanized steel and rusted or corroded at the break | Call a plumber; a fitting on corroded pipe often fails again nearby |
| Break is on the main line before it splits to fixtures, or is longer than a hairline split | Call a plumber |
| You are unsure how to cut pipe, sweat a joint, or work near wiring | Call a plumber rather than risk a failed repair |
Knowing what actually causes a pipe to burst also helps you judge the repair. A one-time freeze crack is a different problem than a system that is failing from age everywhere.
What Is the Difference Between a Temporary Patch and a Permanent Pipe Repair?
A clamp, a rubber patch held with hose clamps, or epoxy putty can slow a leak for a few hours to a couple of days. None of them is a permanent, code-recognized repair.
A pipe repair clamp is a metal sleeve with a rubber gasket; it typically costs $10 to $25 at a hardware store and works only on a small, clean break in a straight, accessible section of pipe.
An improvised version, a piece of heavy rubber wrapped over the hole and secured with hose clamps on both sides, works the same way.
Do not trust a temporary patch at all when:
- The pipe is still under real pressure you cannot lower, such as the main line before any shutoff
- The break is larger than a hairline crack or small pinhole
- The pipe is corroded or thin enough that a clamp could crush it further
- What you actually have is a slow leak rather than a full burst, since a clamp on a leak still needs the same permanent follow-up
Treat every temporary patch as a countdown, not a fix. The EPA notes that wet materials need to dry within 24 to 48 hours or mold is likely, so a patch that only slows a drip still leaves you racing that clock.
How Do You Repair a Burst Pipe Depending on the Pipe Material?
Each pipe material takes a different fitting or method. Push-to-connect fittings work across copper, PEX, and CPVC without tools; PVC and CPVC can also be solvent-welded; galvanized steel almost always needs a plumber.
| Material | Common repair method | DIY difficulty |
|---|---|---|
| Copper | Push-to-connect fitting, compression fitting, or a soldered (sweated) joint | Moderate; soldering needs practice and heat safety |
| PEX | Push-to-connect fitting, or a crimp or clamp ring with the matching tool | Easy to moderate |
| PVC or CPVC | Push-to-connect transition fitting, or cut and solvent-weld a new coupling | Easy to moderate |
| Galvanized steel | Threaded fittings on both cut ends, usually corroded and hard to thread | Hard; call a plumber |
Copper pipe
Push-to-connect fittings are compatible with copper, PEX, CPVC, PE-RT, and HDPE pipe with no tools, solder, or glue required, according to manufacturer SharkBite. A compression fitting or a soldered joint also works but needs the matching tools and, for soldering, an open flame.
PEX pipe
PEX usually repairs fastest: a push-to-connect fitting needs no tool at all, while a crimp or clamp ring needs its own crimping or clamping tool sized to the pipe.
PVC and CPVC pipe
Cut out the damaged section and either push on a transition fitting or solvent-weld a new coupling with primer and cement made for the pipe type. The step-by-step section below covers cure time before you restore pressure.
Galvanized steel pipe
Both cut ends need fresh threads, and old galvanized pipe is often too corroded to thread cleanly. If one section is failing, the rest of the run is usually close behind, so call a plumber rather than patch one spot.
If this pipe burst because it froze, once it is repaired, keep pipes from freezing again this winter.

What Are the Step-by-Step Instructions for a Permanent Pipe Repair?
Confirm the water is off and drained, cut back to clean round pipe past any damage, dry-fit the new section, join it, then test at low pressure before opening the main valve fully.
Tools and materials to have ready:
- Pipe cutter or hacksaw sized for the pipe material
- Replacement pipe section and a fitting matched to the material
- Emery cloth or sandpaper to clean the pipe ends
- Tape measure, marker, bucket, and towels for residual water
- Safety glasses and gloves
- For soldering: flux, solder, and a torch
- For solvent weld: primer and cement made for that exact pipe type
- Confirm the main valve is off, and open the lowest fixture in the house to drain remaining water from the line.
- Cut back the damaged section to clean, round pipe with no visible cracks, pitting, or splits.
- Measure and dry-fit the replacement piece and fitting before making any joint permanent.
- Join the pipe with the method made for the material: push-to-connect, a compression fitting, a crimped PEX ring, a soldered copper joint, or a solvent-welded PVC or CPVC joint.
- If you solvent-welded a joint, let it cure before pressure testing. A 1/2 to 1-1/4 inch CPVC joint needs about 1 hour at 60 to 100 degrees Fahrenheit for systems up to 180 psi, per Oatey's manufacturer cure-time chart, and Oatey notes that figure is for new installations, not a repair cut-in, so give a repair joint extra time.
- Turn the main valve back on slowly and watch the joint closely for several minutes before you consider the repair done.
Is It Safe to Solder or Use a Torch Indoors?
Yes, if you ventilate the room, keep a fire extinguisher within reach, and shield any wood framing near the joint. Never leave a lit torch unattended.
A propane torch burns fuel and produces carbon monoxide, an odorless gas. The US Consumer Product Safety Commission notes that carbon monoxide comes from the incomplete burning of fuels including propane and can cause headache, fatigue, and dizziness at lower exposure, worsening to confusion or worse at higher levels. Open a window and run a fan while you work.
- Wear safety glasses and heat-resistant gloves, following This Old House's guide to using a blowtorch
- Work in a ventilated area, not a closed closet or cabinet
- Keep a fire extinguisher or a bucket of water within reach
- Inspect the torch and fuel canister for leaks or damage before each use
- Never leave a lit torch unattended, and let the joint cool before touching it
If any of this makes you uneasy, choose a push-to-connect or compression fitting instead. Both join copper pipe without any flame at all.
Do You Need a Permit, and Can a Bad DIY Repair Affect Your Insurance Claim?
Many building departments require a permit to repair or replace water pipe, and a failed unpermitted or poorly done DIY repair can affect a later insurance claim.
Permit rules vary by city and county. Santa Cruz County's building department, for one real example, generally requires a plumbing permit whenever piping is installed, altered, repaired, or replaced, unless a specific exemption applies. Call your own local building department before you treat a repair as finished.
Insurers commonly treat a failed do-it-yourself or unpermitted repair as a maintenance or negligence issue, which can affect a future claim if that same spot fails again. See whether homeowners insurance covers a burst pipe for the full coverage rules, including what counts as neglect.
This is general information, not legal or insurance advice. Check your own policy and your local code before you call a permanent repair finished.
How Much Does It Cost to Fix a Burst Pipe Yourself vs Hire a Plumber?
A DIY clamp or push-to-connect repair runs about $10 to $30 in parts. Hiring a licensed plumber commonly runs $150 to $250 per linear foot, or $200 to $3,000 total, depending on access and how much pipe is replaced.
| Option | Typical cost | Notes |
|---|---|---|
| DIY temporary clamp, patch, or epoxy putty kit | $10 to $30 | Parts only; temporary |
| DIY permanent push-to-connect or compression fitting | $10 to $40 per fitting | Parts only; you supply the skill and tools |
| Licensed plumber, per linear foot replaced | $150 to $250 | Most of this is labor |
| Licensed plumber, hourly or flat rate | $45 to $200 per hour, or $100 to $1,250 flat | Plus a possible $50 to $300 travel fee |
| Emergency or after-hours call-out | Adds $100 to $300 | On top of the repair itself |
About 80% of a typical burst-pipe repair bill is labor, based on contractor cost estimates, not government data, which is why a simple, accessible break costs far less than one behind a wall or ceiling. For the wider cost of cleanup and drying beyond the pipe repair itself, see what water damage restoration typically costs.
When to call a professional
Call a professional right away if any of these apply:
- The pipe is inside a wall, under a slab, or underground: call a licensed plumber rather than cutting into the structure yourself.
- The pipe is galvanized steel and shows rust or corrosion at or near the break: a fitting on corroded pipe is likely to fail again nearby.
- The break is on the main line before it splits to fixtures, or is larger than a hairline split or pinhole.
- You are not confident cutting pipe, sweating a joint, or working near electrical wiring: a failed DIY repair usually costs more than calling a plumber the first time.
- Your jurisdiction requires a permit for this repair and you are not doing it as a permitted, inspected job.
Frequently asked questions
How long does it take to fix a burst pipe?
A push-to-connect repair on an accessible section of pipe can take well under an hour once the water is off. A licensed plumber's visit, including diagnosis, parts, and testing, commonly runs one to two hours, based on contractor estimates. Add time if a permit and inspection are required, or if the pipe is hidden behind a wall, floor, or slab.
Can I just use tape or glue to fix a burst pipe?
Plumbing repair tape, rubber patches, and epoxy putty can slow a leak temporarily, but none of them is a permanent fix accepted by plumbing codes. Regular household duct tape is not rated for pressurized water and should not be relied on even briefly. Use a real fitting matched to the pipe material for anything beyond a short-term stopgap.
Is a push-to-connect fitting a permanent repair, or just another temporary one?
Manufacturer fittings such as SharkBite are designed, and marketed by the manufacturer, as a permanent connection when installed to the product's instructions, unlike a clamp or rubber patch. Even so, confirm with your local building department whether the repair needs a permit or inspection, since code acceptance and permit rules vary by location.
What is the difference between fixing a small leaking pipe and a fully burst pipe?
A leak is usually a slow drip you can sometimes clamp and monitor for a while, while a burst is a split or break releasing a high volume of water fast, so the water must be shut off immediately, before any repair starts. Both still need a permanent fitting or patch once the water is off, not just a lasting clamp.
Does a repaired pipe need pipe insulation afterward?
If the pipe burst because it froze, insulate the repaired section, and any other exposed pipe nearby, before winter returns. Foam pipe sleeves are inexpensive and simple to install on accessible runs. For pipe inside an uninsulated wall or crawlspace, adding insulation to the space itself, or rerouting the line, usually does more than sleeving the pipe alone.
Can I turn the water back on right after installing a repair fitting?
For a push-to-connect fitting, yes, once you have visually confirmed the pipe is fully seated. For a soldered copper joint, let it cool completely first. For a solvent-welded PVC or CPVC joint, follow the cement's cure time on the label before restoring full pressure, since a repair cut-in typically needs more time than a new installation.
Sources
- US EPA, A Brief Guide to Mold, Moisture and Your Home
- US Consumer Product Safety Commission, Carbon Monoxide Fact Sheet
- This Old House, How to Choose and Use a Blowtorch
- Oatey Co., Solvent Weld Cure Times for PVC, ABS and CPVC
- Santa Cruz County, CA, When Is a Plumbing Permit Required
- SharkBite, Push-to-Connect Fittings (manufacturer compatibility information)
- Contractor cost estimates for burst-pipe repair (Angi, HomeAdvisor, Fixr, HomeGuide)
- General insurance-industry guidance on DIY or unlicensed repair and claim risk (consumer finance coverage)